
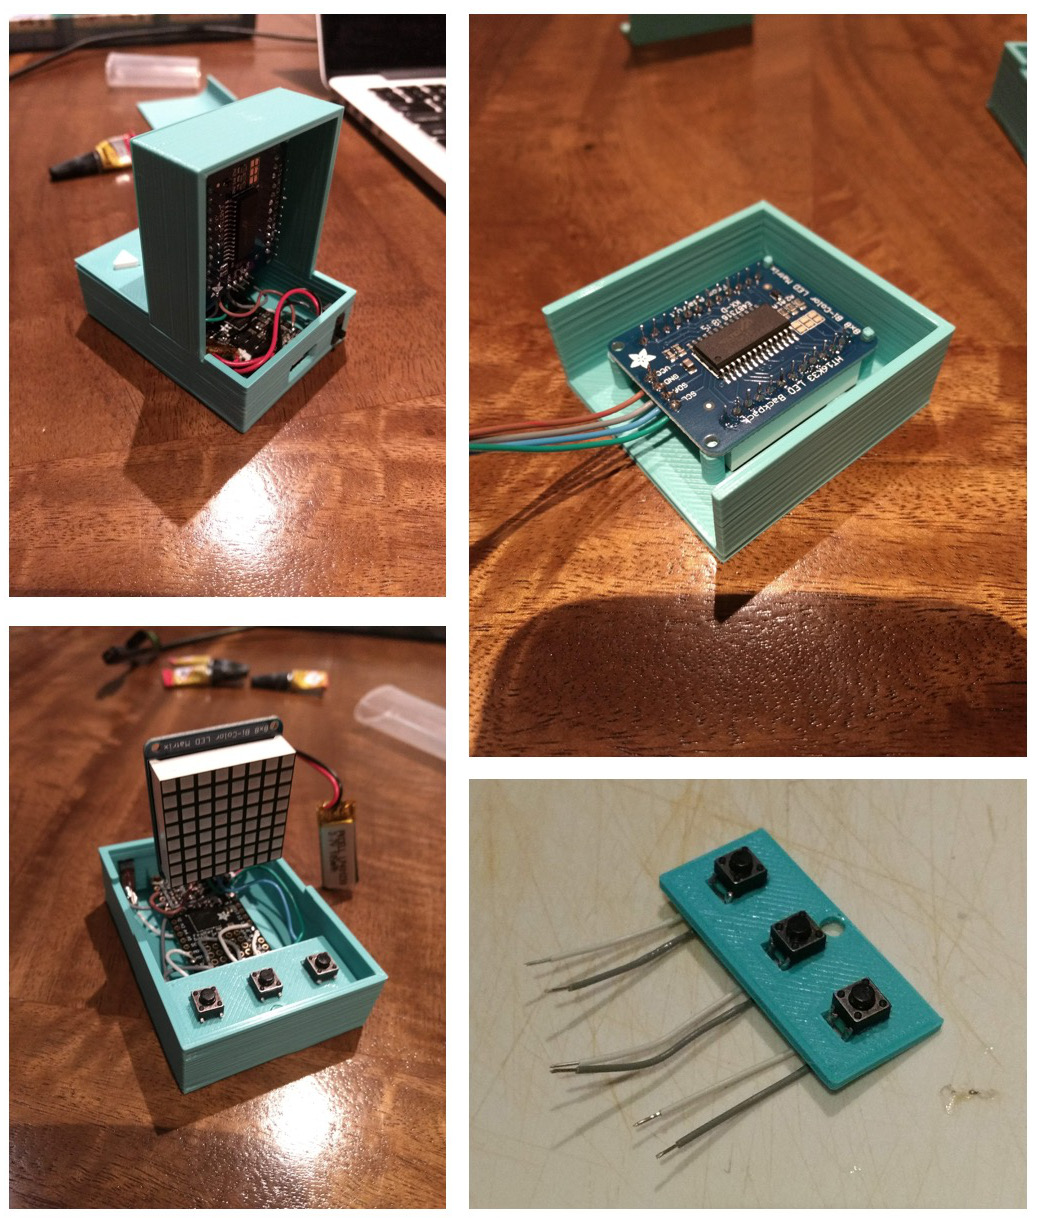
I had the matrix display sitting around for a while, and I had been trying to think of a cool project to use it for. When a group of colleagues at work started up a connect4 python bot programming challenge, I got inspired to try and implement a bot into the lower-powered processing capabilities of a smaller micro-processor, so I thought this would be a great use for the display. I started off by testing out the display: I soldered on the backpack to the LED matrix and wires onto the power, ground and I2C lines on the backpack so I could connect it to a breadboard. I hadn't soldered on the headers for my featherboard M0, and I had a Gemma M0 sitting around so I connected it up to the backpack using some jumper leads and alligator clips to test it. I used the 3.3V output from the Gemma: seems to drive the matrix with no problems. I downloaded the Adafruit libraries to drive the LED backpack and the Adafruit GFX library, which provides some basic functionality for drawing primitive geometry and rendering text to the display: I ran one of the example scripts for the backpack and all was working well.

I started developing the code for a connect4 game and an AI to play against. The AI uses a Monte Carlo Tree Search algorithm for evaluating the next best move based on simulating games to approximate win/loss statistics. This seemed like the quickest and easiest approach to develop, seemed to require less memory that a Minimax approach, and I'm assuming provides a little bit of random variation in the AI's play, such that games against a human would be a bit more interesting.
Played around a bit with the AI to try and get it to prioritise early wins/avoiding early losses: cost for loss = 42-n_moves, cost for win = 42-n_moves, then score = win_cost - loss_cost: works OK, but doesn't correctly prioritise avoiding when the player will definitely win on the next turn: so I had to hard code a few initial checks in so the AI first looks for instant win moves, then for moves which block the player winning on the next move, then Monte Carlo.

Once I was happy with the code, I started working on the design of the physical device and casing. I started off with the idea of having a custom-built rotary input wheel on the top of the game that would allow the player to turn the wheel to move the location of the piece to drop, then click the wheel to drop the piece. I bought some mini trimpots to use as input with custom-designed 3D printed cog to interface with trimpot. After experimenting with a couple of 3D prints for the knob, I ended up dropping this idea as the trimpots I could find all had so much friction, that they were almost impossible to turn using a single finger without having to have a giant sized knob to achieve the appropriate torque. I ended up instead going with a more traditional arcade button layout with one button to move the cursor position left, one right and a third button to place the token.

I designed the 3D printed case to look a little bit like a connect4 board, except that it's quite fat, which is needed to fit everything inside (particularly the matrix display, which is quite thick when the breakout board is soldered on). It printed from multiple sections that are then glued together.

For the electronics, I began by laying out in the case where the components would fit and how I would wire everything together. The case is quite small, so I had to plan out the layout of wires to ensure it did't get too messy on the inside. I wired all the electronics together first, separate from the case, and tested everything was working, before moving on to connecting and gluing on the case.
I really enjoyed working on this project: it was fun to design a case that had a couple if different sections and was a little less "flat" than some of the previous 3D printed electronics projects I've worked on before.
Design Files:
3D Printed Case STL and OpenSCAD files:
https://www.thingiverse.com/thing:3785812
Code for game control and AI:
https://github.com/mit-mit-randomprojectlab/arduino_connect4